Load Balancing
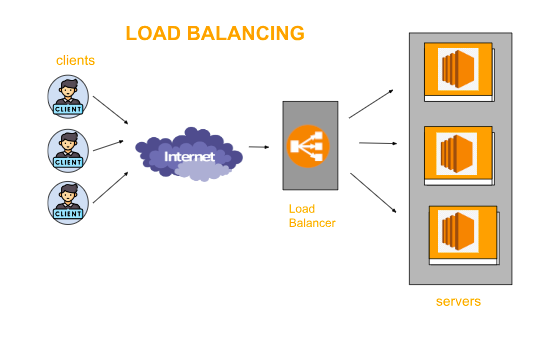
Load balancing is a method of distributing traffic among all other running servers equally and helps to optimize application availability. Basically, a load balancer work as a traffic balancer sitting in front of your servers and distributing all client end request to each server equally. Modern applications have high-end traffic and millions of users who receive correct data, text, and information from every user. To handle this type of traffic request there are a number of severe running with duplicate data present in them so, a load balancer helps to distribute the traffic coming from the client to each running server and ensure that every resource is used equally.
How Load Balancing Work?
Load Balancing can be used in two different ways one is Hardware load balancing that are physically installed and maintained on-premises other one is Software load balancing which is software installed on a standard server or a virtual machine.
Load Balancer basically helps to direct the incoming traffic and distribute it among the pool of servers according to the chosen algorithm.
The load balancer also checks the health of back-end servers if one of the servers does not work load balancer will not send traffic to that server that is not able to fulfill the request.
Benefits of load balancing
- Scalability
Load balancer helps you to predict the incoming traffic so it helps you to add or remove a server and also use it to direct application traffic to multiple servers.
- Availability
Load balancer helps in fault tolerance i.e. automatically detects the problem of the server and directs the traffic to the running server so that application doesn’t crash.
- Performance
Load balancer helps you to increase your application response time by reducing the network latency by redirecting the client request to the closest server present. Also, help by distributing traffic equally to each server to increase performance.
- Security
Load balancers include SSL encryption, MFA, and web application Firewalls which help your application’s security
Load Balancing Algorithms.
How a load balancer distributes the traffic across the server is defined by this algorithm these are the set of rules that a load balancer follows to distribute traffic. fall into two categories
- Static load balancing
- Dynamic load balancing
Static load balancing
Static load balancing algorithms are independent of the current server state and follow fixed rules some of the algorithms are below
- Round-robin method
forward the traffic to each server turn by turn One of the simplest methods to distribute traffic
- Weighted round-robin method
Similar to round-robin but different a numeric weight is defined for the server according to the performance of the server
- IP Hash method
Work on IP and Hask key, an algorithm that uses source IP and destination IP of client and Server to generate a hash key
Dynamic Load balancing
Dynamic load balancing examines the current state of servers before distribution traffic to the server’s algorithm is defined below
- last connection methods
Traffic is distributed to the least number of connection that is active at the time of client request received.
- Weighted least connection method
This maintains a list of the weighted application servers with their active number of connections. uses more computation times than the least connection algorithm.
- Least response time method
It collects the response time of the call made to the server and on that information instance will be picked to receive the traffic.
- Resource-based method
This algorithm distributes the incoming traffic on the basis of load on the server.
Types of load balancing
- Application Load Balancing
- Network Load balancing
- Gateway Load Balancing
- Classic Load Balnacing
Application Load Balancing
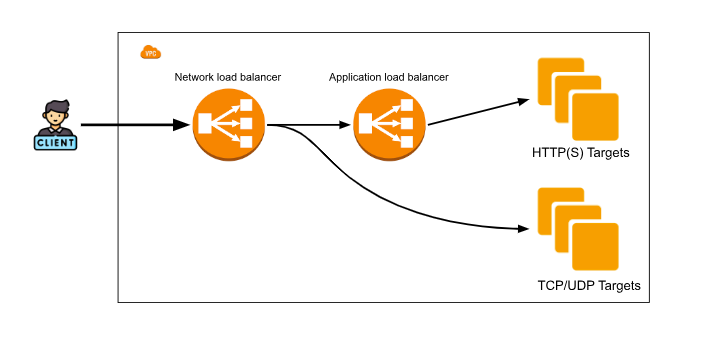
Application load balancing works with applications with HTTP and HTTPS traffic. It works on the Application layer of the OSI model. It enables a flexible feature set for your web application. This load-balancing technique distributes all incoming application traffic across multiple servers. This will help you to increase the availability of the application
Network Load Balancing
Network Load Balancer focuses on high-speed, low-latency traffic handling mainly focusing on TCP, TLS, and UPD protocols. It works on the network layers of the OSI model. when you need ultra-high performance, TLS offloading at scale, centralized certificate deployment, support for UDP, and static IP addresses for your application.
How to configure the load balancer?
- If you have an AWS account then log in to your account, if not then you have to create your AWS account to access the services of AWS. You can create your AWS account by using the link given below.( https://portal.aws.amazon.com/)
- In your EC2 dashboard on the left side scroll down and you will find an option for Load Balancing.
- The first step is to create two EC2 instances with different availability zones that contain your application.
Note
If you want to check your load balancing is working you need to apply changes on your application which means both instances contain the same application with different outputs so that you can further identify which server is running.
Creating Target Groups
- Before creating a load balancer you have to create a Target group that contains the instance which you want to target. This target group helps you to route requests to one or more registered targets.
- Click on the Target group under the load balancing option you will find an option to create target groups.

- In target groups, you will find the basic configuration in which you have to select the target i.e. instance, IP address, Lambda function, and Application load balancer.
- Select an option on which you want to create a load balancer in our case we are using instances.
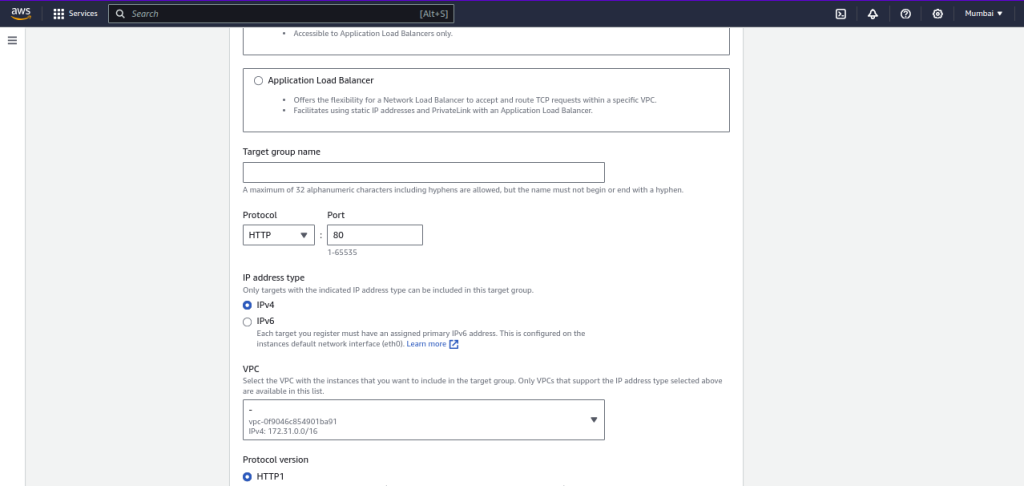
- In the next step you need to give a name to your target group after that select a protocol and port number and also select an IPv4/IPv6 address, and also select the VPC in which you have created your instances.
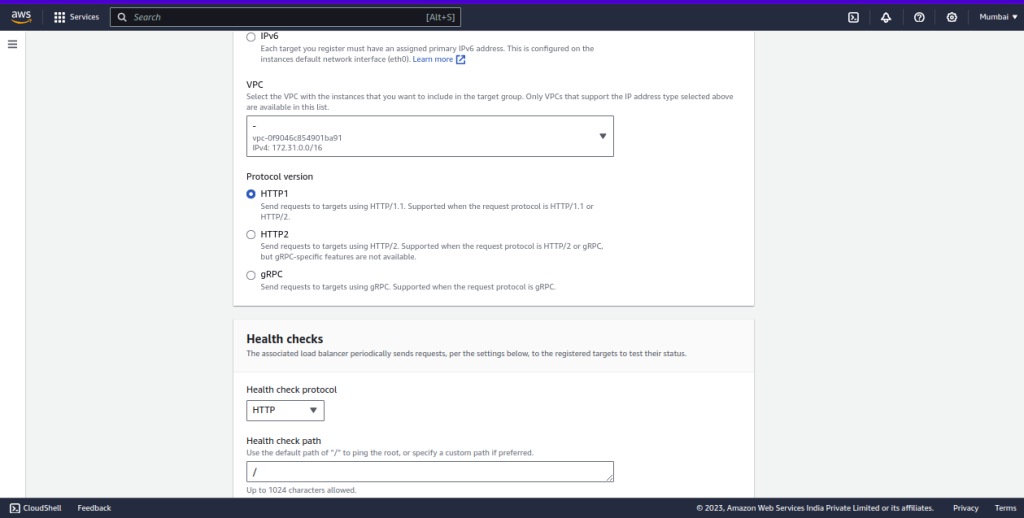
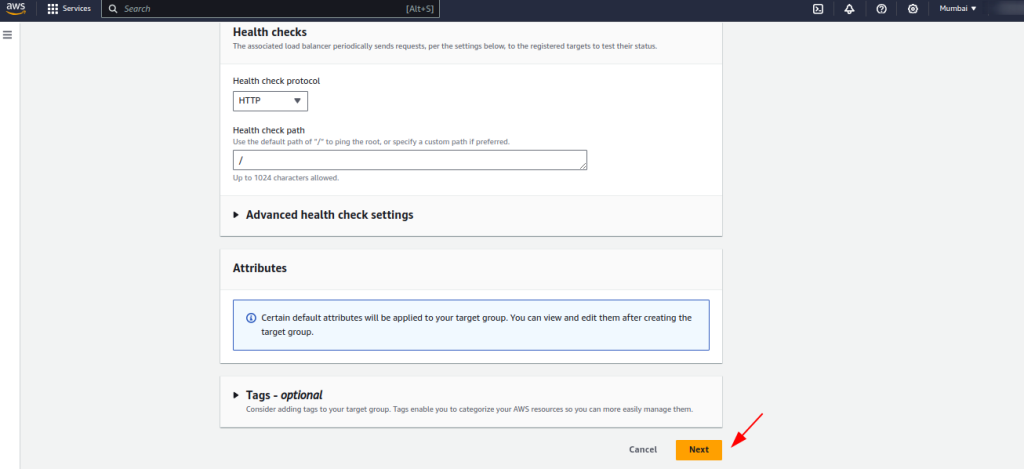
- The next step is to select the protocol for your target group, and below that you will find the health check option for your protocol you can also configure additional settings for your health check.
- If you want to give tags to your target group then click on the tags option and then click on the Next button.
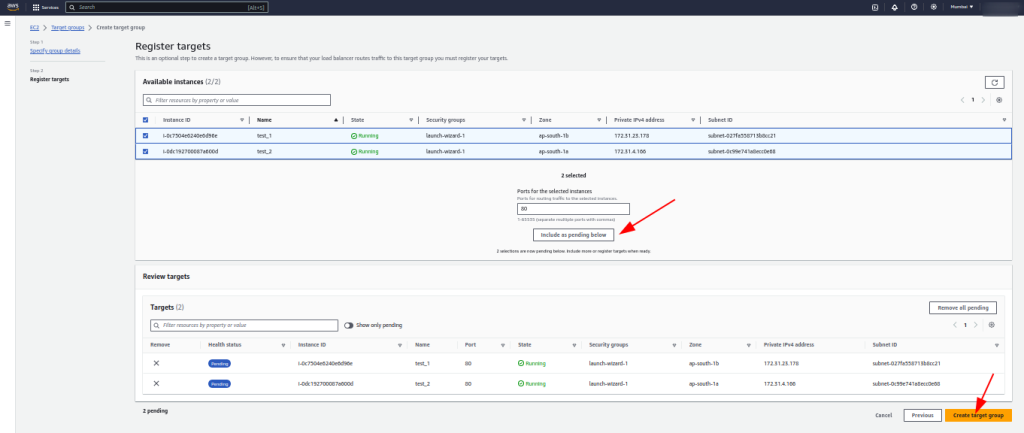
- In the next step, you have to select your targets. Select those targets on which you want to distribute your targets, and click on include as pending below option.
- Just below in review targets, you will see your target select and then click on create target groups.
- Go to the target group dashboard you will see your target created check the health of your target groups if it shows healthy go to the next step.
Creating Load Balancer
- On the left side of the EC2 dashboard, you will find an option for load balancing click on that.
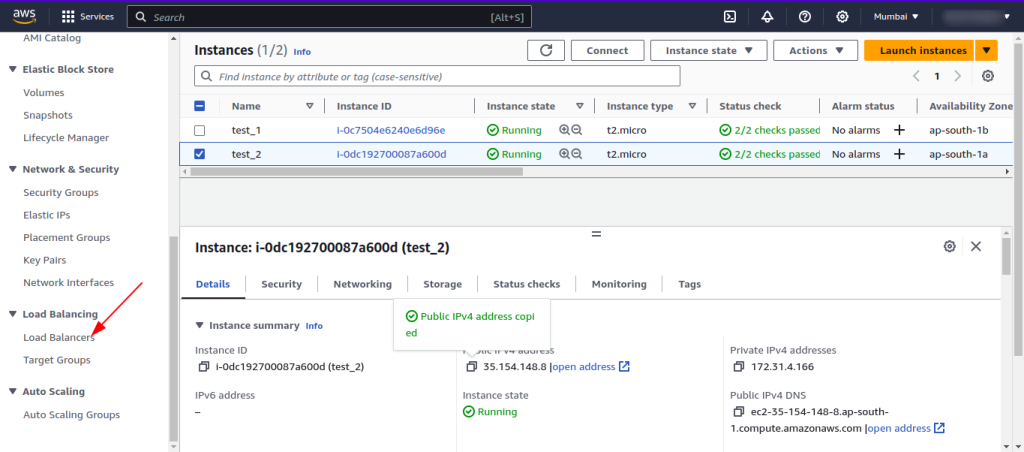
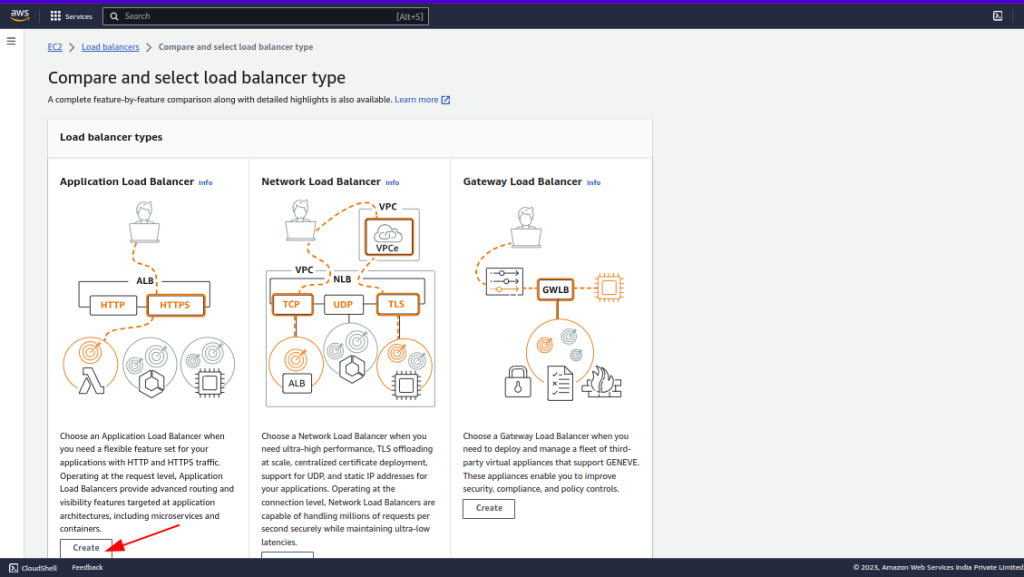
- You will find an option to create load balancing by clicking on the create load balancer option.
- 3 options are provided to you for creating load-balancing we will create by using application load balancing click on create below application load balancing.
- Give a name to your load balancer just below that you have two options one for request from the internet and the other one from the internal network.
- The internet facing requires a public subnet and route request from the client over the internet to the target.
- The Internal needs a private subnet and route request internal.
- Choose IPv4 if you want to use IPv6 you have an option of dual stack.
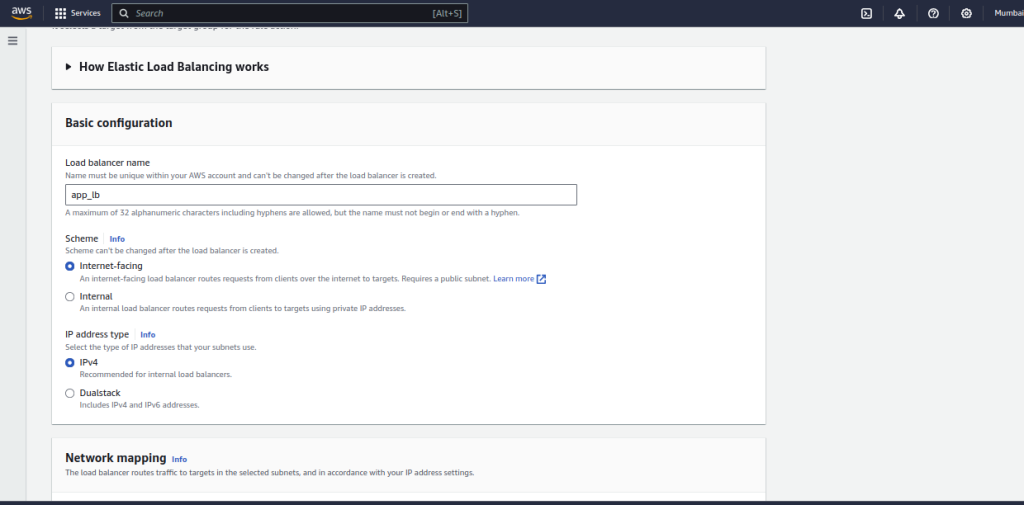
- The next step is internet mapping in which you need to select VPC and subnets in which you have created your instances.
- A load balancer will only work if you have a minimum of 2 instances with different Availability zone .
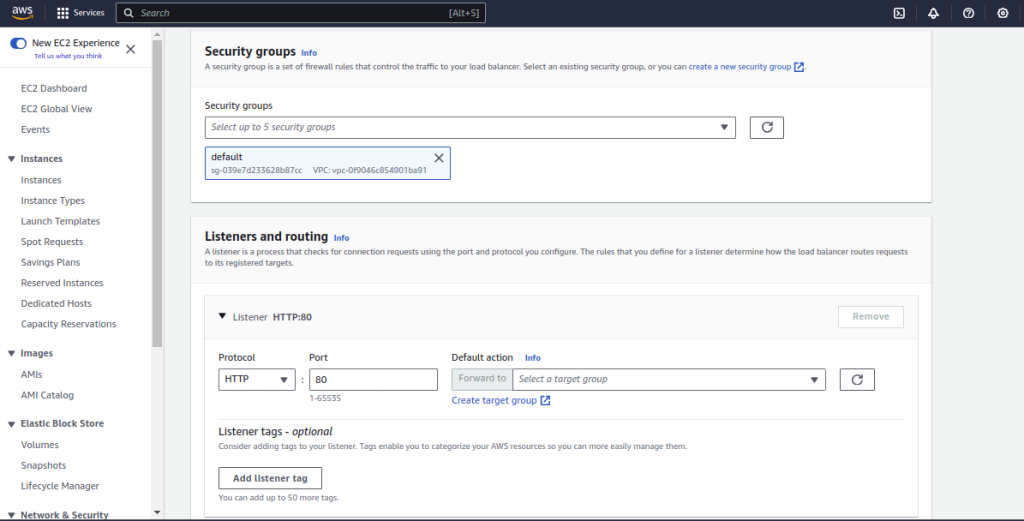
- The next step is to select a security group for your load balancer you can use the existing one or create new one.
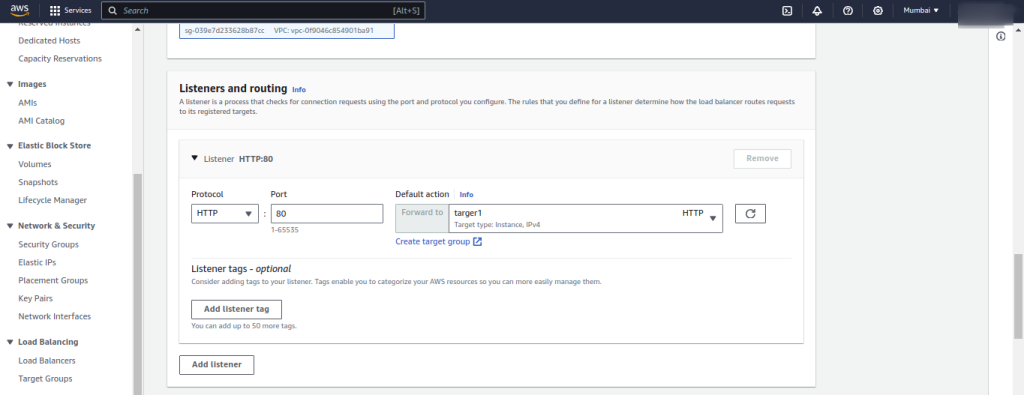
- After that add a listener and routings, basically listener will help you to check the connection request using the port and protocol you configure.
- And select the Target group that you created befor.
- If you want to add a tag to your load balancer you can add it and then check the summary and click create load balancer.
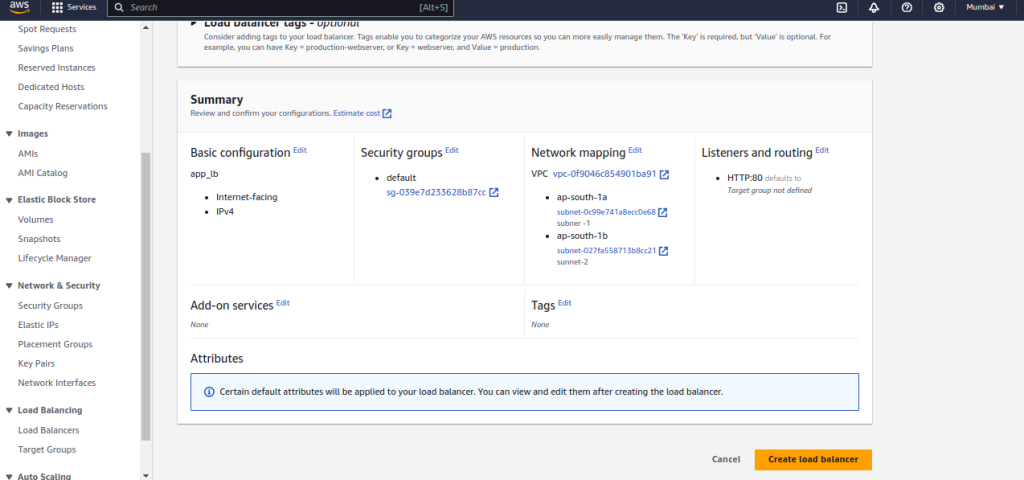
- After creating you will see your created load balancer on the dashboard. if you want to check that your balancer is working or not, Copy DNS name of your load balancer just shown below .
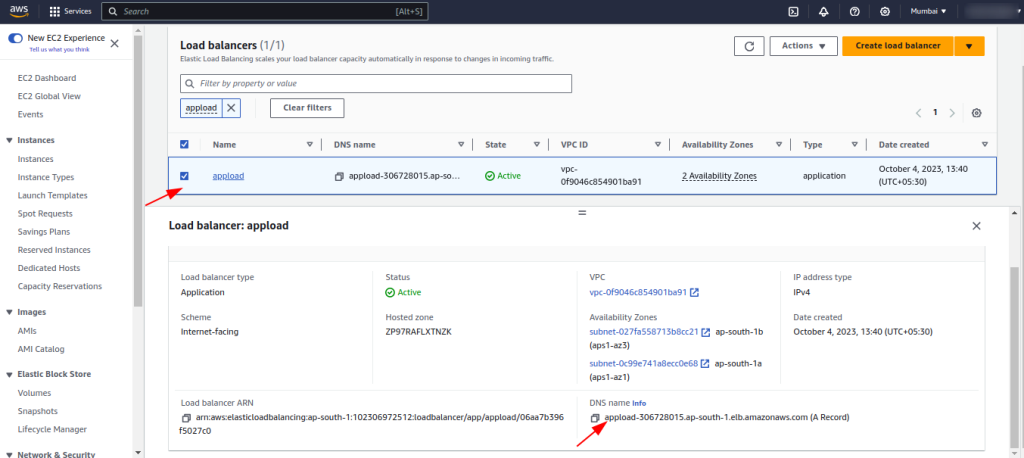
- After copying DNS name open Google tan paste DNS and search will see your website after you refresh for some time you will see it will change as you define in your ec2 instance.
