
What is AWS ECS
AWS ECS (Amazon Elastic Container Service) is a fully managed container orchestration service provided by Amazon Web Services. It allows you to run, manage, and scale Docker containers in a cluster of EC2 (Elastic Compute Cloud) instances or on AWS Fargate, which is a serverless compute engine for containers.
Procedure
I am creating a Docker image that will include Postfix, PHP, and Apache2. This image will also incorporate a few website pages and a PHP script designed to send emails directly from the container. The installation of these components will be handled within a Dockerfile, ensuring that the necessary dependencies are set up correctly for seamless functionality.
To facilitate dynamic configurations, I will utilize an entrypoint script. This script will execute each time a new container is launched, allowing it to capture the container’s IP address. This is essential for configuring Postfix and ensuring that the email functionality operates as intended. By storing the IP address, we can ensure that any configurations dependent on networking will be accurate.
Once the image is built, I will push it to AWS Elastic Container Registry (ECR). This step is crucial for managing the image in a cloud environment, enabling us to efficiently deploy it across various services. Following the push to ECR, I will create a new AWS Elastic Container Service (ECS) cluster, leveraging the capabilities of AWS Fargate for container orchestration.
Finally, I will set up a Fargate service within the ECS cluster and attach a Load Balancer to manage incoming traffic. This architecture will provide a robust environment for the web application, allowing for scalability and ease of maintenance while ensuring that the email sending capabilities are fully functional.
Files
Postfix Configuration file (main.cf)
smtpd_banner = $myhostname ESMTP $mail_name (Ubuntu)
biff = no
append_dot_mydomain = no
readme_directory = no
compatibility_level = 3.6
smtp_tls_note_starttls_offer = yes
smtp_tls_security_level = encrypt
smtp_sasl_password_maps = hash:/etc/postfix/sasl_passwd
smtp_sasl_security_options = noanonymous
relayhost = [email-smtp.us-east-1.amazonaws.com]:587
smtp_sasl_auth_enable = yes
smtp_use_tls = yes
smtpd_tls_key_file = /etc/ssl/certs/ca-certificates.crt
smtpd_tls_cert_file = /etc/ssl/certs/ca-certificates.crt
smtp_tls_CAfile = /etc/ssl/certs/ca-certificates.crt
smtpd_tls_loglevel = 3
smtpd_tls_received_header = yes
smtpd_tls_session_cache_timeout = 3600s
tls_random_source = dev:/dev/urandom
mynetworks = 1.2.3.4
entrypoint.sh
#!/bin/bash
PUBLIC_IP=$(curl -s https://api.ipify.org)
#Check if PUBLIC_IP was retrieved successfully
if [ -z “$PUBLIC_IP” ]; then
echo “Error: Unable to retrieve the public IP address.”
exit 1
fi
CONTAINER_IP=$(hostname -i)
#Fetch the task’s IP address
TASK_METADATA=$(curl -s http://169.254.170.2/v2/metadata)
TASK_IP=$(echo “$TASK_METADATA” | jq -r ‘.Containers[0].Networks[0].IPv4Addresses[0]’)
#Now, you can use these variables to update the Postfix configuration
echo “mynetworks = 127.0.0.0/8, $PUBLIC_IP, $CONTAINER_IP, $TASK_IP” >> /etc/postfix/main.cf
#Start Postfix in the background
service postfix start
#Start Apache in the foreground
exec apache2-foreground
Dockerfile
FROM php:8.0-apache
# Create non-root group and user, set home to the web root
RUN addgroup –system apache
# RUN adduser –system –home /var/www –group apache_group –uid 1001 web_root
RUN useradd -r -d /var/www -s /sbin/nologin -g apache apache
RUN apt-get update
RUN apt-get -y install vim
RUN apt-get -y install sed
RUN apt-get -y install libsasl2-modules
RUN apt-get -y install m4
RUN apt-get install -y jq
# Configure Postfix to use “Internet Site”
ENV DEBIAN_FRONTEND=noninteractive
RUN echo “postfix postfix/mailname string yourdomain.com” | debconf-set-selections && \
echo “postfix postfix/installation-type select Internet Site” | debconf-set-selections
RUN apt-get update && apt-get -y install postfix mailutils
# Use the default production configuration
RUN mv “$PHP_INI_DIR/php.ini-production” “$PHP_INI_DIR/php.ini”
# edit php.ini file to enable mysqli
RUN sed -i ‘s/^;extension=mysqli/extension=mysqli/’ “$PHP_INI_DIR/php.ini”
# Modify the php.ini file to disable expose_php
RUN sed -i ‘s/expose_php = On/expose_php = Off/’ “$PHP_INI_DIR/php.ini”
# Modify php.ini to set session cookie parameters
RUN { \
echo “session.cookie_secure = 1”; \
echo “session.cookie_httponly = 1”; \
echo “session.cookie_samesite = Lax”; \
} >> “$PHP_INI_DIR/php.ini”
# Modify Apache configuration to not disclose its version
RUN echo “ServerTokens Prod” >> /etc/apache2/apache2.conf
RUN echo “ServerSignature Off” >> /etc/apache2/apache2.conf
WORKDIR /var/www/html
COPY license.datamystic.com /var/www/html
COPY main.cf /etc/postfix/main.cf
# append server IP info
COPY sasl_passwd /etc/postfix/sasl_passwd
RUN postmap hash:/etc/postfix/sasl_passwd
RUN chown root:root /etc/postfix/sasl_passwd /etc/postfix/sasl_passwd.db
RUN chmod 0600 /etc/postfix/sasl_passwd /etc/postfix/sasl_passwd.db
COPY entrypoint.sh /usr/local/bin/entrypoint.sh
RUN chmod +x /usr/local/bin/entrypoint.sh
# remove the config files from the container
RUN rm -rf _config
# set permissions on all web files – at higher folder, to allow access to .htpasswd
RUN chown -R apache:apache /var/www
RUN chmod -R 755 /var/www
RUN docker-php-ext-install pdo_mysql mysqli
RUN a2enmod rewrite
EXPOSE 80
CMD [“/usr/local/bin/entrypoint.sh”]
Step-1 : Create ECR Repository
Click “Create repository”

Give it a name

Click “Create”

Step-2 : Create Docker image & push it to ECR Repository
Click on Repo just created
Click “view push commands” to get commands to create & push image to ECR

Login into AWS CLI to push image to ECR
Copy and paste one by one all commands shown on “view push commands”


Step-3 : Create ECR Cluster
Click on “Create Cluster”

Give it a name and click “Create”

Then create Task definition

Give it a name and select Launch type “AWS Fargate”, select CPU and Memory according to your need.

copy image UPI from ECR

Select a IAM Role, and open port 80 & 25, an paste image URI

Click “Create
Step-4: Create Service in ECS Cluster
in Cluster Service click “Create”

In Launch type Select Fargate & in Deployment type Service
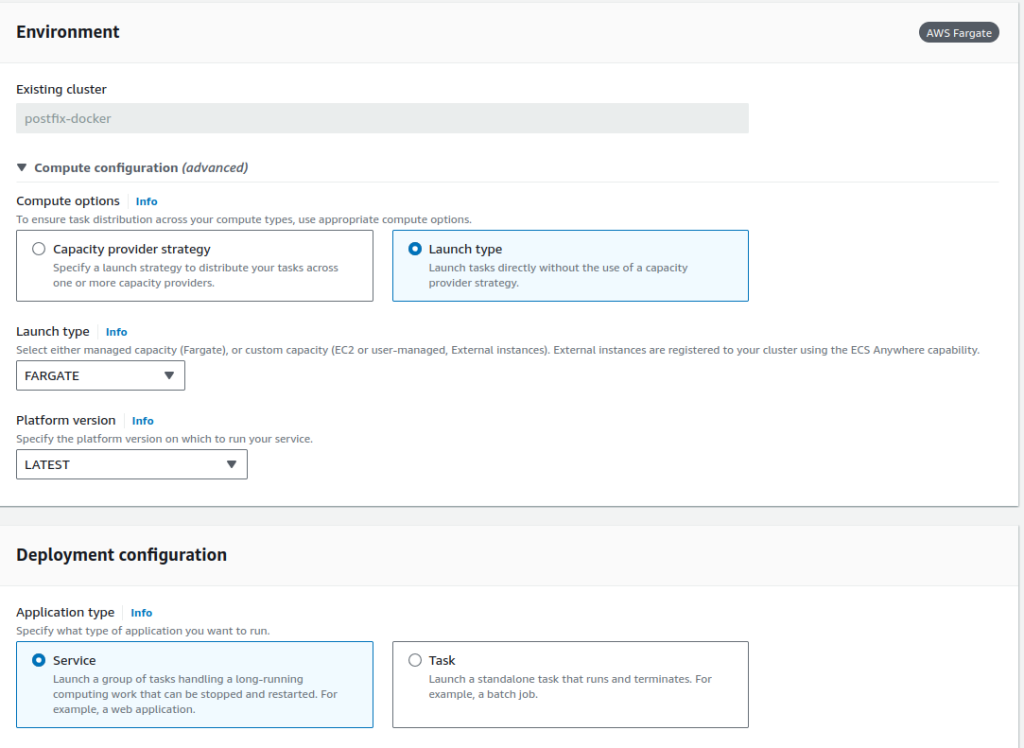
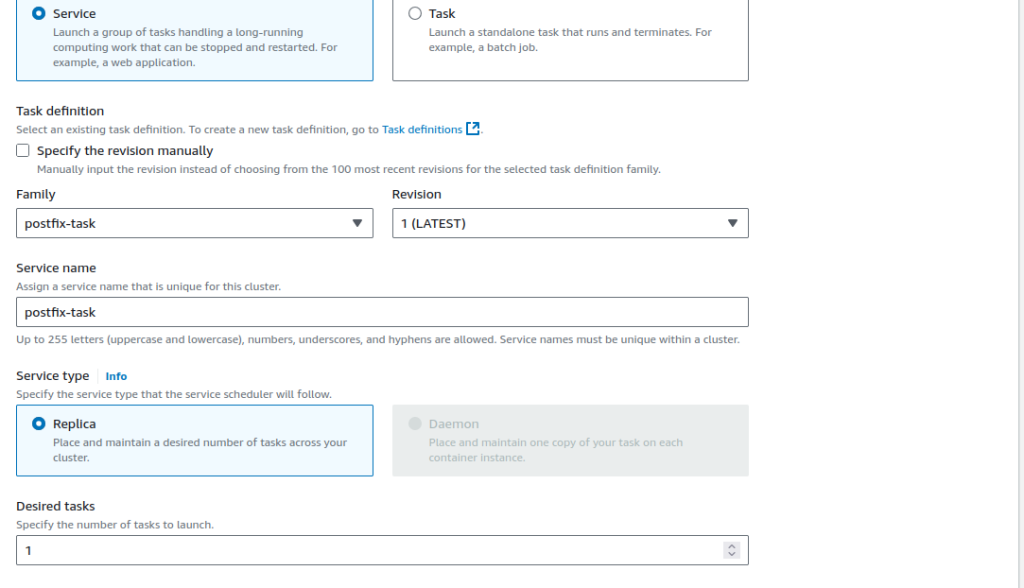
In family select the Task defination which we created recently and give service a name
In VPC select your desired VPC, Subnet, and Security group.
In Load Balancer fill details accordingly.
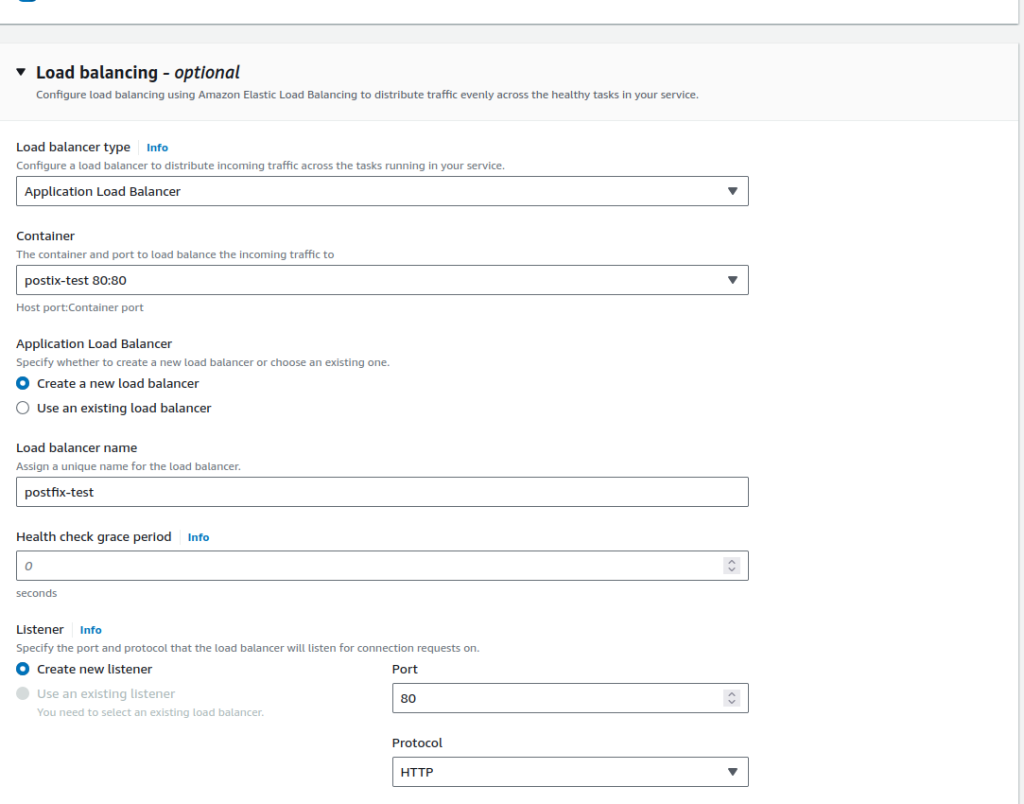
then click “Create” it will take time.
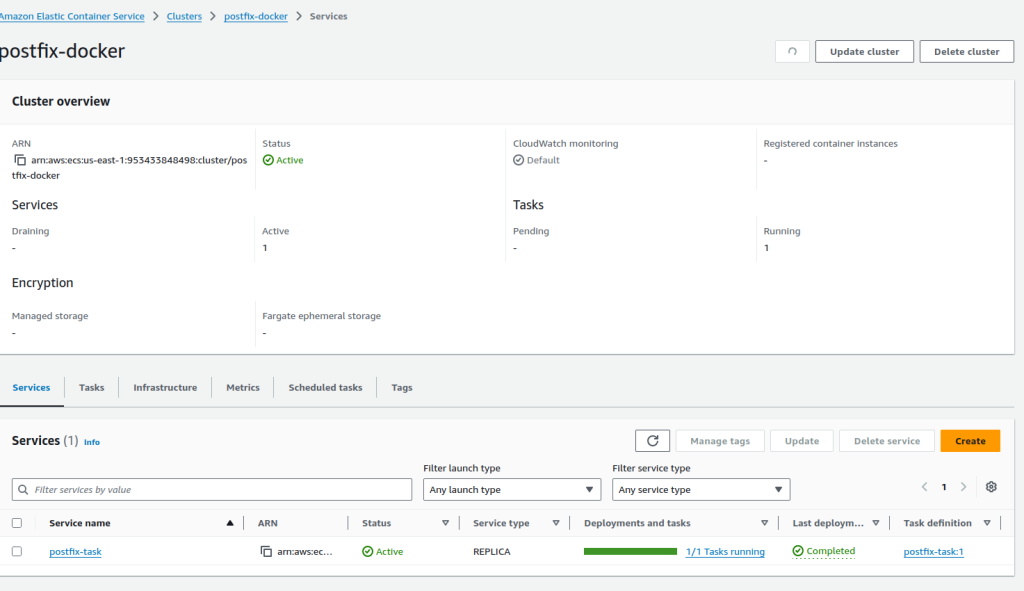
You will get Load balancer endpoint now you can hit it to check if you mail is going or not.
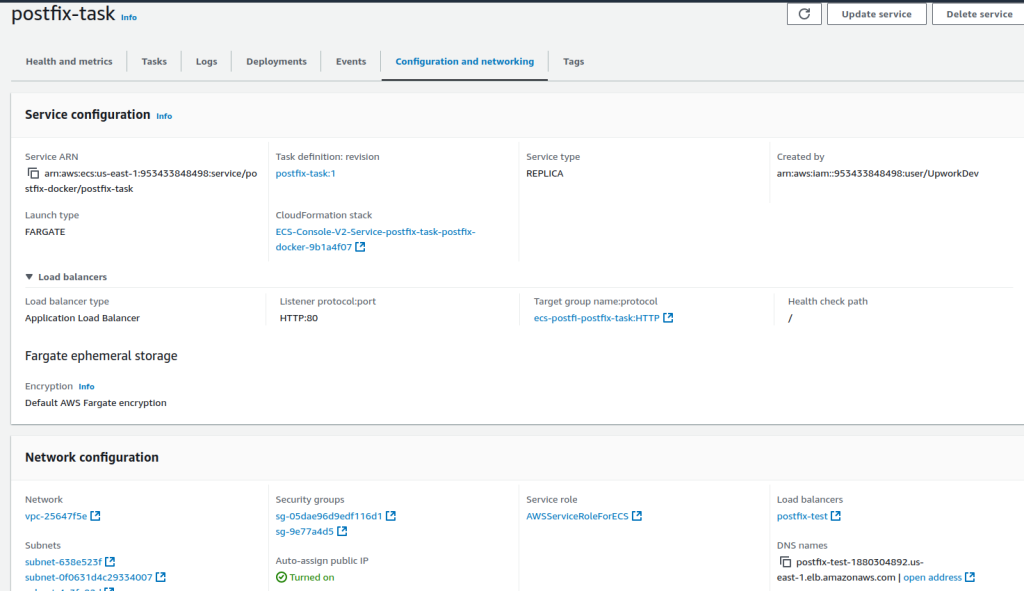
Hit on Load Balancer endpoint/php script to send mail.


